Manual setups
Selecting Manual Settings mode#
If you select Manual Settings in the Presets dropdown, you will be able to choose the TFs yourself to find a confluence of signals on the specific TFs that you see fit for your trading.
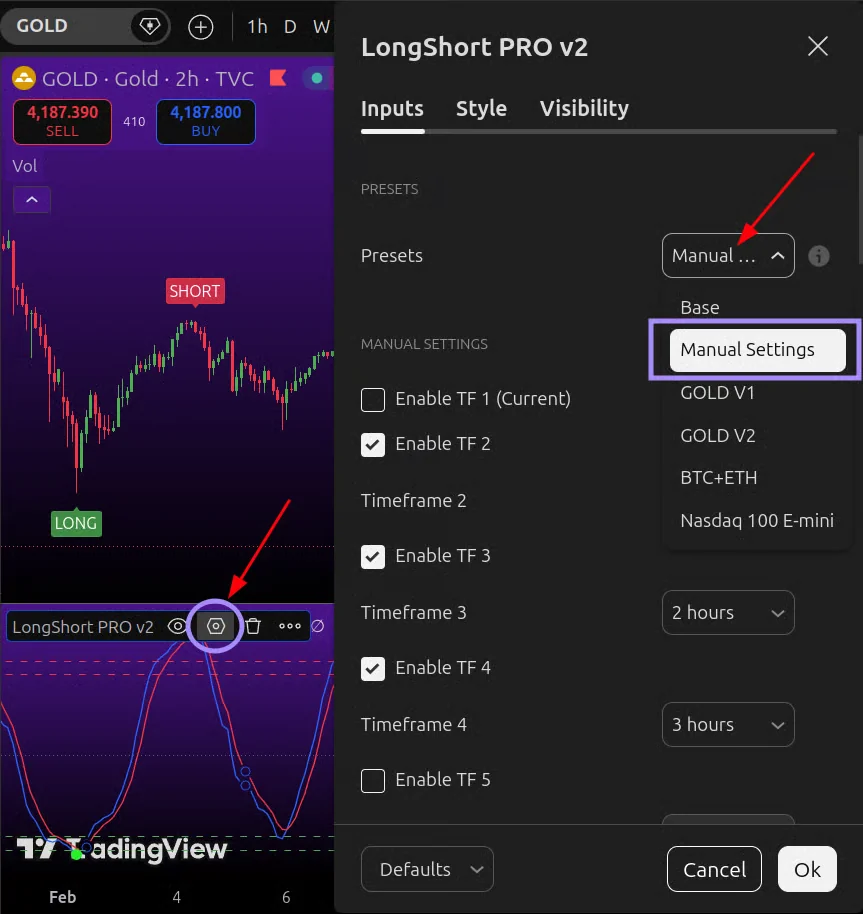
Selecting timeframes#
To select a timeframe, you must check the box and choose a value.
The general rule is to select at least two timeframes in order to see a confluence of signals on multiple TFs.
A more effective way is to choose 3 timeframes:
- one TF that you wish to trade on
- one lower TF to help make the signal more precise
- one higher TF to trade in line with the higher trend
If you plan on trading on the 30-minute TF, a useful setting could be:
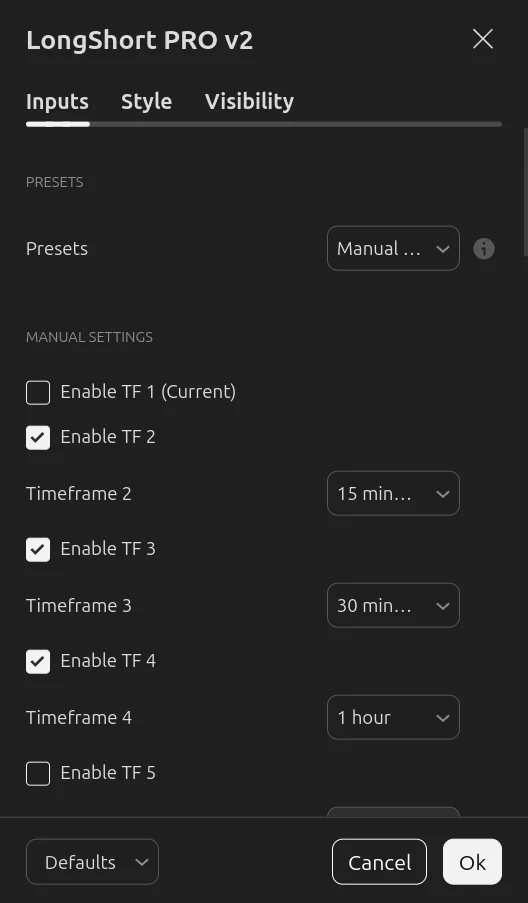
Enable TF 1 (Current) enables tracking of the timeframe the chart is currently open on.
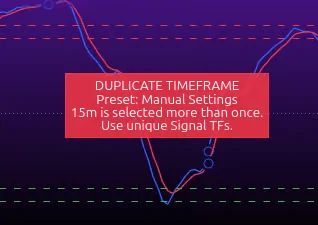
To ensure correct operation, avoid duplicating timeframes in the settings: all active timeframes must be different.
For example, TF 2 – 15min, TF 3 – 30min, and TF 4 – 1h are selected for tracking in the settings. If you check Enable TF 1 (Current) and open the chart on 15 minutes, the timeframes will be duplicated and the indicator will return an error.
- The more timeframes you add, the less frequent the trades will be, but the higher the probability of it being a good signal because of the confluence across multiple timeframes.
- If you plan on trading indices or metals that generally go up and to the right, you should look only for long setups and ignore the short signals.
- If you plan on trading crypto, you should take into account the macro trend – BTC bull or bear market – to trade in line with the higher trend rather than looking for counter-trend moves.
Setting up Stop Loss and Take Profit zones#
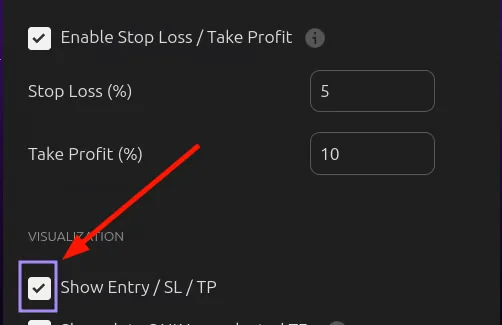
In Manual Settings mode, you can set the distance to the stop and target yourself as a percentage of price, and the model tracks trades until they close at one of the levels. These levels apply only in Manual Settings.
"Enable Stop Loss / Take Profit"
Enables trade tracking, SL and TP, and blocking of simultaneous positions.
If disabled, signals remain, but without model trade tracking and without the ACCOUNT TABLE – MODEL.
"Stop Loss (%)"
The distance from the model entry to the stop as a percentage of price.
"Take Profit (%)"
The distance from the model entry to the target as a percentage of price.
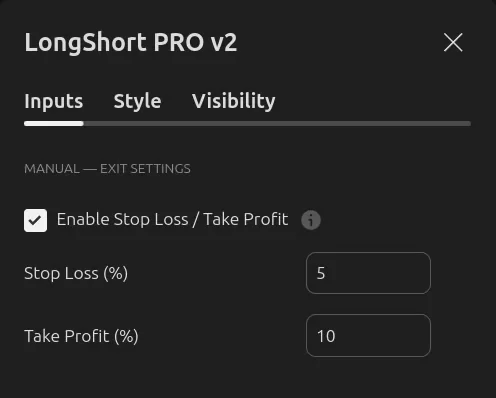
To see the zones on the chart, also enable Show Entry / SL / TP. This checkbox only controls the visual display on the chart and does not disable position tracking.
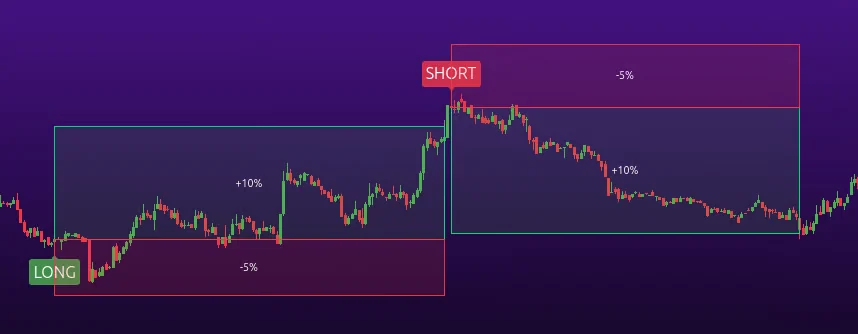
The chart keeps the zones of the last 20+ trades (the number depends on your TradingView subscription; the higher the subscription, the more it shows).
The absence of old zones does not mean old signals are missing – on a longer history, signals are still shown, but without SL / TP zones.
Additional information on how this model works can be found in the Setting up SL/TP zones section.
Setting up filters#
Signal Settings: signal direction and thresholds.
This block defines which signals the indicator accepts and how strict the conditions must be. It applies in Manual Settings mode: in Base, GOLD V1, GOLD V2, BTC+ETH, and Nasdaq 100 E-mini, the levels and direction are set by built-in rules.
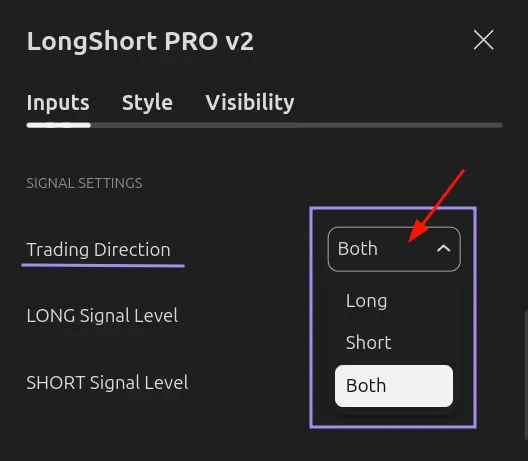
"Trading Direction"
Direction selection: Long allows LONG signals only, Short allows SHORT only, Both allows both directions.
"LONG Signal Level - 20"
The threshold for LONG. A signal is possible when K is strictly below this value on all enabled timeframes. Lowering the threshold (for example, to 15) narrows the allowed zone and makes the condition stricter.
"SHORT Signal Level - 80"
The threshold for SHORT. A signal is possible when K is strictly above this value on all enabled timeframes. Raising the threshold (for example, to 85) narrows the allowed zone and makes the condition stricter.
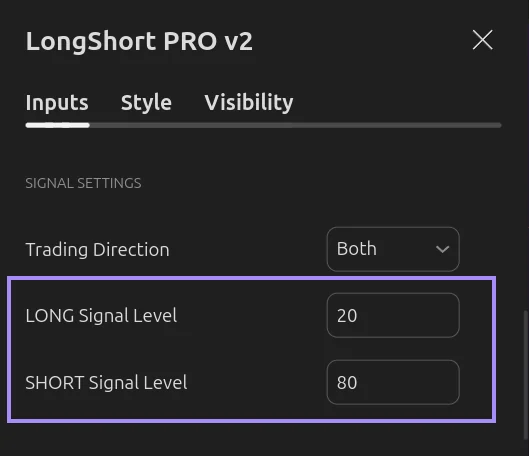
LONG Signal Level must always be lower than SHORT Signal Level, even if only one direction is selected.
Filters determine when the indicator is allowed to accept new signals. They look at the K value on the higher timeframe (Filter Timeframe) and allow or block entries depending on its position. The filter itself does not create an entry and does not close an open model position: a signal still requires the conditions of the selected timeframes.
The two filters cannot be enabled at the same time. To trade in both directions, use the Direction Filter; for one direction, use the Global Filter.
Direction Filter#
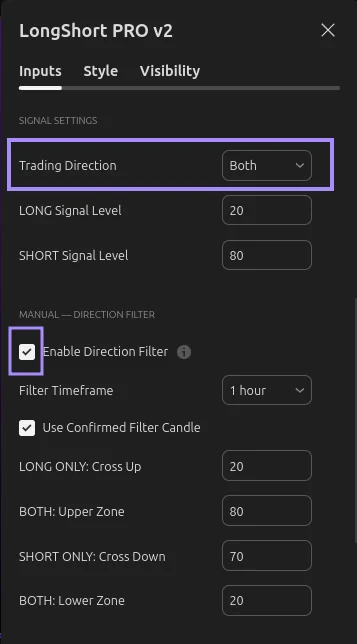
The Direction Filter can be used if Trading Direction = Both: it determines which directions are currently allowed (LONG only, both, or SHORT only) based on the position and movement of K on the higher timeframe.
When a single direction, Long or Short, is selected, the filter is not used.
To use the Direction Filter:
- Trading Direction must be set to Both.
- Check Enable Direction Filter.
Filter settings:
"Filter Timeframe" (1h by default).
Specifies the timeframe whose K the filter uses to determine the state.
You do not need to add it to the tracked timeframes; this is a separate check.
"Use Confirmed Filter Candle" (enabled by default).
Uses the completed filter candle.
When disabled, the forming value is used, and the state may change before the candle closes. For your first look, leave it enabled.
Global Filter#
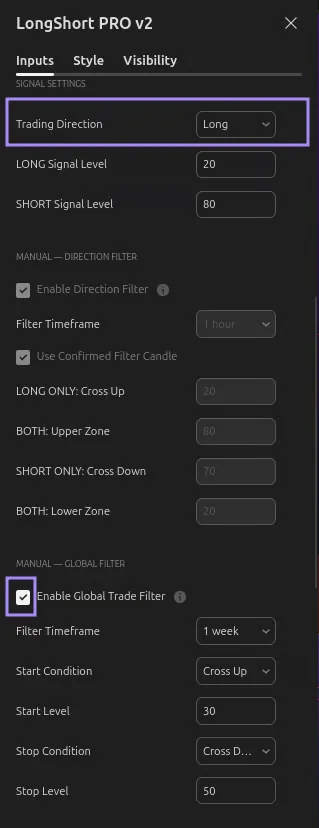
The Global Filter enables and disables permission for new signals in one direction depending on K on the higher timeframe. It is available when Trading Direction = Long or Short and does not work at the same time as the Direction Filter.
To use the Global Filter:
- Trading Direction must be set to Long or Short.
- Check Enable Global Trade Filter.
When Trading Direction = Long or Short – Direction Filter settings become unavailable.
Filter settings:
"Filter Timeframe" (1 week by default).
The timeframe used to check start and stop. Less frequent candles produce less frequent events, but this does not guarantee a better result.
"Start Condition" and "Start Level" (Cross Up, 30 by default).
The crossing direction and level after which new signals are allowed.
"Stop Condition" and "Stop Level" (Cross Down, 50 by default).
The crossing direction and level after which new signals are blocked.
Additional information on how the filters work and are configured can be found in the Setting up filters section.
Setting up the table and costs#
The account table (ACCOUNT TABLE – MODEL) appears only in modes with defined SL/TP levels.
Table settings#
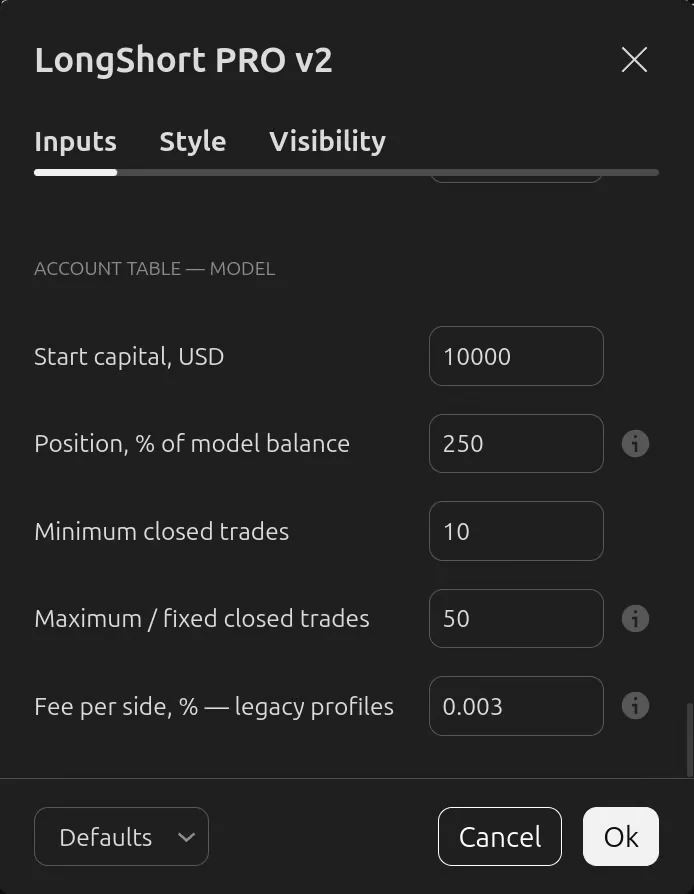
"Start capital, USD"
The initial capital of the model account. 10,000 USD by default.
Changes the table's cash figures, not the entry points.
"Position, % of model balance"
The notional of the position relative to the model balance.
100% = 1x, 200% = 2x, 300% = 3x.
For example, with a balance of 10,000 USD, a value of 200% gives a position of 20,000 USD. This is the position size, not the risk to the stop.
Increasing the size increases both profit and loss.
Margin requirements, liquidation, funding, and swap are not modeled in this table.
"Minimum closed trades" (10 by default)
The minimum number of recent trades for comparing ranges. Allowed from 5 to 50.
"Maximum / fixed closed trades" (50 by default)
The maximum number of recent trades stored.
Allowed from 10 to 50.
To look at a fixed number of trades, set both parameters to the same value.
For example:
Minimum closed trades = 30
Maximum / fixed closed trades = 30
"Fee per side, % — legacy profiles"
The commission on entry and separately on exit, accounted for in Manual Settings, BTC+ETH, and GOLD V1 45s modes.
0.003% per side by default. This setting affects the table; it does not add spread and slippage modeling to these profiles.
How to read the account table#
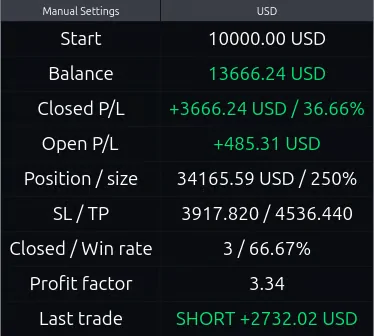
The table displays an account in USD, not your broker or exchange balance. It is based on trades from the loaded chart history.
| Row | What it means |
|---|---|
| Start | The initial amount from which the selected range is recalculated. |
| Balance | Initial amount + the result of closed trades in the selected range. |
| Closed P/L | Profit or loss of closed trades in USD and as a percentage of the initial amount. |
| Open P/L | Current model profit or loss of the open position. A dash means there is no open position. |
| Position / size | The calculated notional value of the open position in USD, based on the selected position size as a percentage of the model balance. |
| SL / TP | The stop and target prices of the active model trade. A dash means there is no open position. |
| Closed / Win rate | The number of closed trades in the selected range and the share of profitable ones among them. |
| Profit factor | Total cash profit / total cash losses, ignoring the minus sign. For example: 1.5 means 1.5 USD of profit per 1 USD of loss. This is not a win percentage. |
| Last trade | The direction and cash result of the last closed trade in the calculation of the selected range. |
Additional information on how the account table works and is configured can be found in the Setting up the table section.
Setting up alerts#
Once you have set up your strategy, you can enable a notification for signals appearing on the chart with your settings.
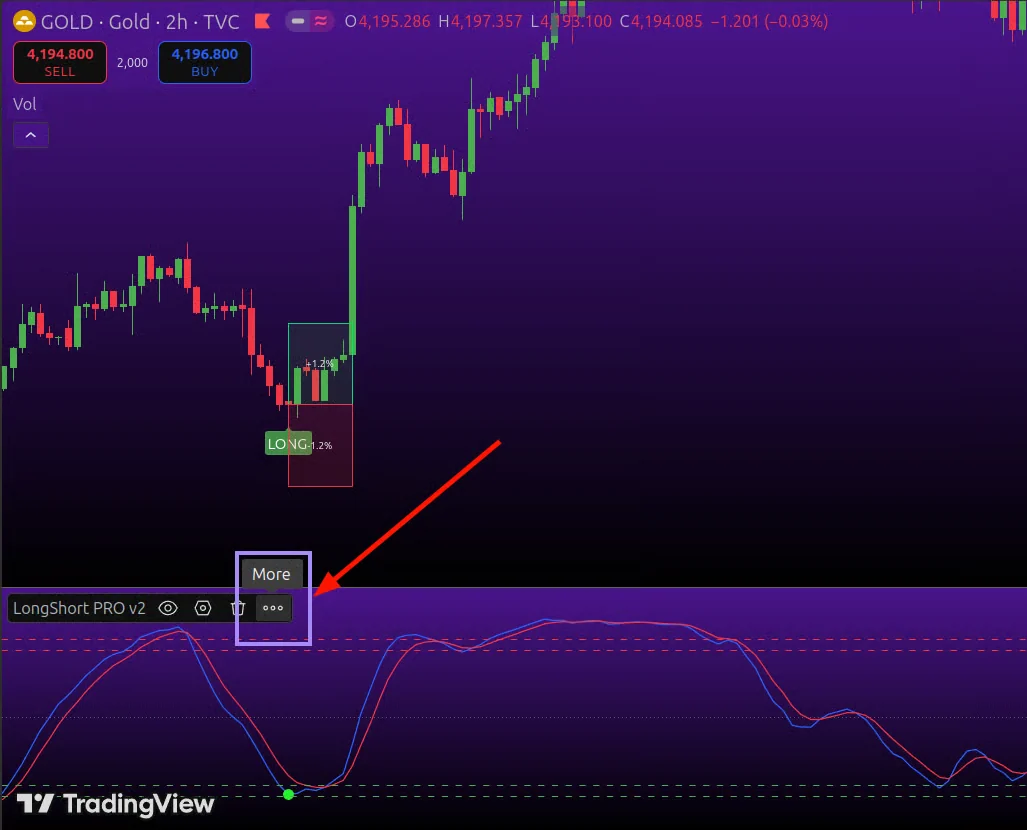
Next to the indicator name, click the three dots.
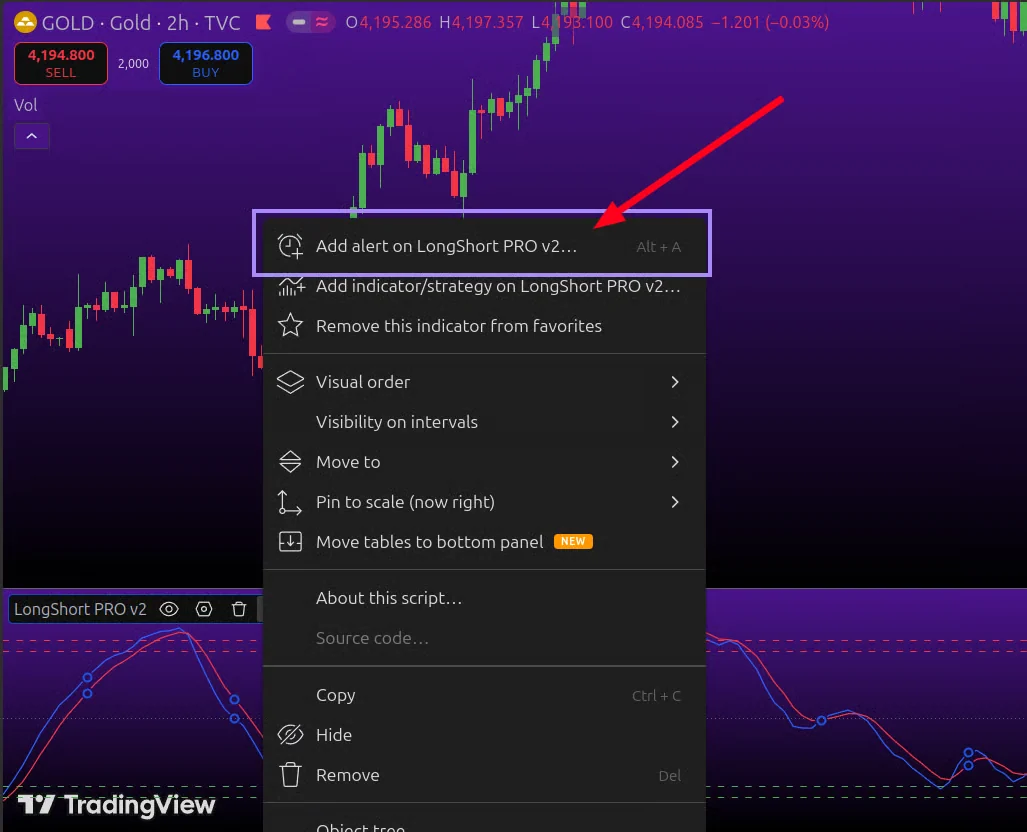
Select "Add alert on LongShort PRO...".
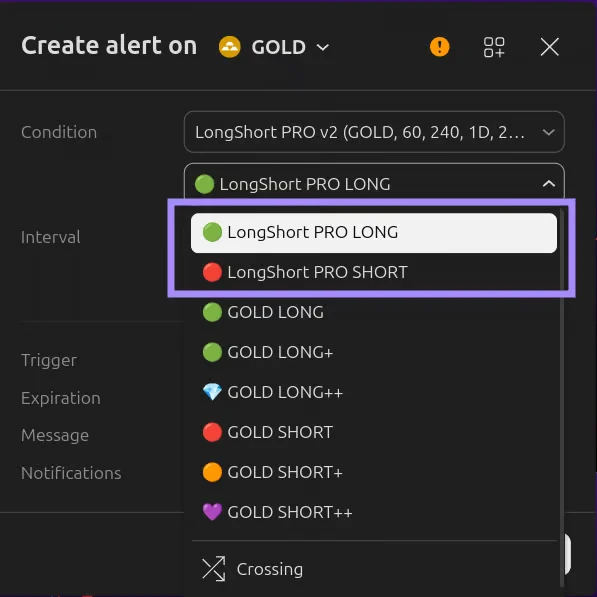
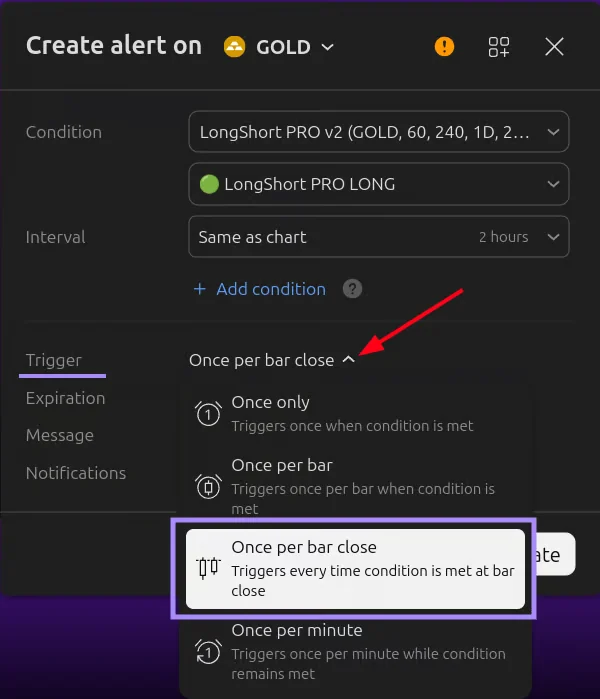
Next, select which signal you want to get alerts for – green LONG or red SHORT. Don't change the interval; leave it as on the chart.
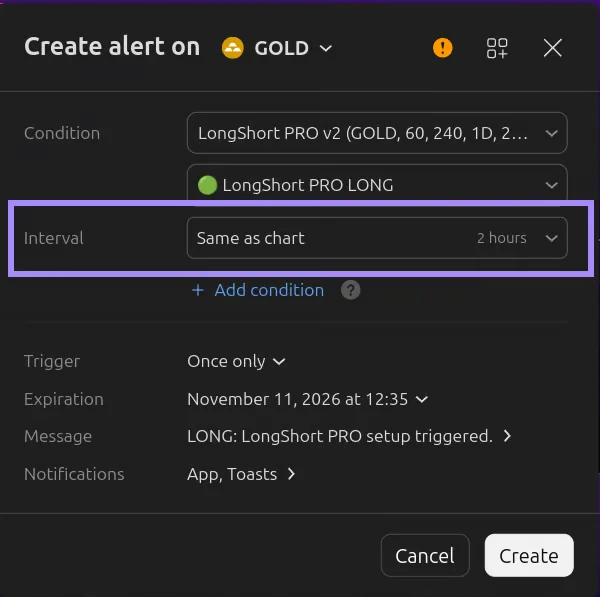
Change the "Trigger" field to "Once per bar close". Then click "Create".
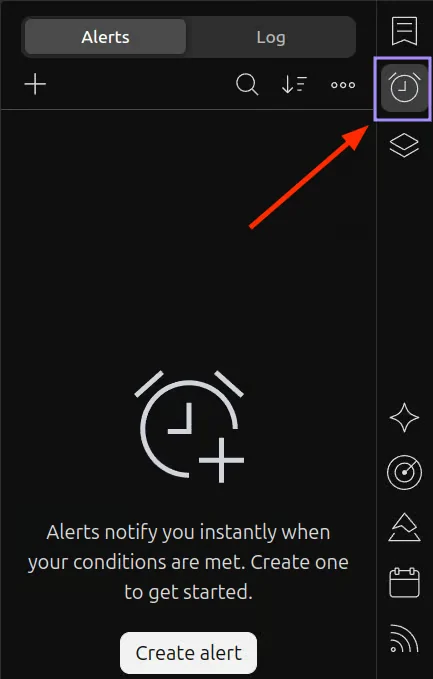
You can track active alerts on the Alerts tab in the top right corner of TradingView.
After changing settings, timeframe, or indicator version, recreate the alert: TradingView uses the parameters saved when it was created. Hiding drawings on the chart does not disable alerts that were already created.
Official TradingView help on alerts:
https://www.tradingview.com/support/solutions/43000595315-how-to-set-up-alerts/
In the free TradingView subscription, you can create an alert only once. This is a TradingView limitation, not an indicator limitation. If alerts are important to you, consider upgrading your TradingView subscription.